If you want to download apps on your TV or upgrade the firmware then you need to connect it to a stable Wi-Fi network. However, Sharp TVs run on different operating systems, so you may need to follow an entirely different method if you want to connect Sharp TV to Wi-Fi. But it can be extremely confusing for users. That’s why we have created a detailed guide on connecting your Sharp TV to the Wi-Fi network. So keep reading.
Quick Answer: The methods for connecting the Wi-Fi network with Sharp TV vary depending on your model. But make sure you choose the right home Wi-Fi network and add the accurate password for a successful connection.
Method To Connect Sharp Roku TV To Wi-Fi
- On your Roku remote, locate the Settings button and click it. Now go to the Home screen.
- Tap on the Network option.
- Click on the Set up connection.
- Now click on the Wireless option. It is present on the right side of the screen.
- From the list, click on your home Wi-Fi network. Type the Wi-Fi credentials, and you can easily connect the Wi-Fi to the Sharp TV.
Method To Connect Sharp Android TV To Wi-Fi
- Turn on your Sharp Android TV.
- Go to the Home screen of the TV.
- Visit Settings, and click on the Network & Internet option from here.
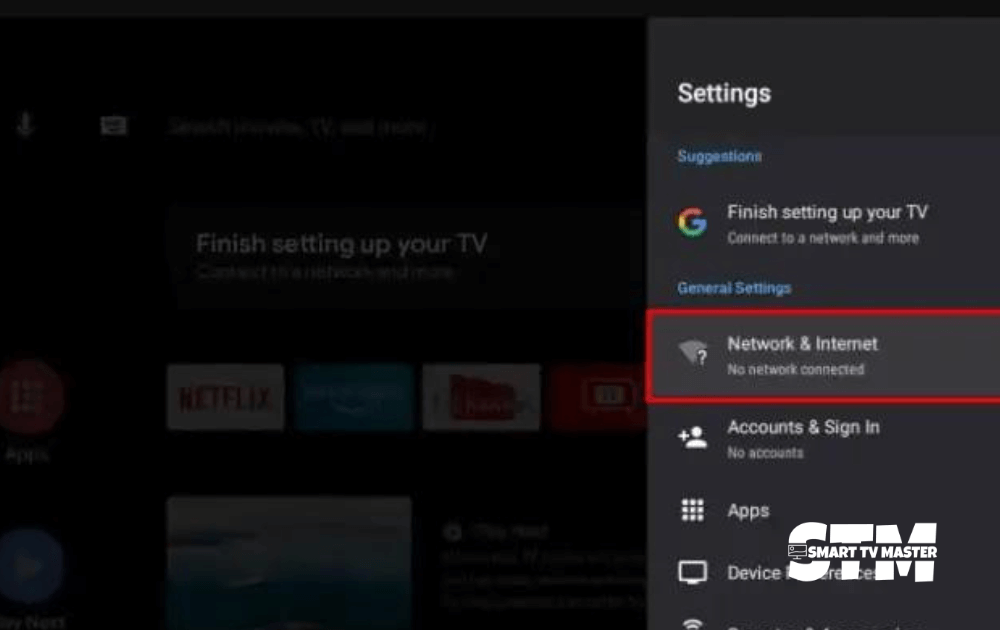
- Here, you will see the WLAN button. Toggle it and then tap on Ok.
- Once you do that, you’ll get a list of all the nearby active networks.
- Click on your home network and insert the password using the Roku remote control.
- That’s it. You’ve established an internet connection with the Sharp TV.
Method To Connect Sharp Google TV To Wi-Fi
- Turn on your Sharp Google TV. Go to its Home screen and click on the Profile icon.
- Head over to the Settings by pressing the Settings button on the remote.
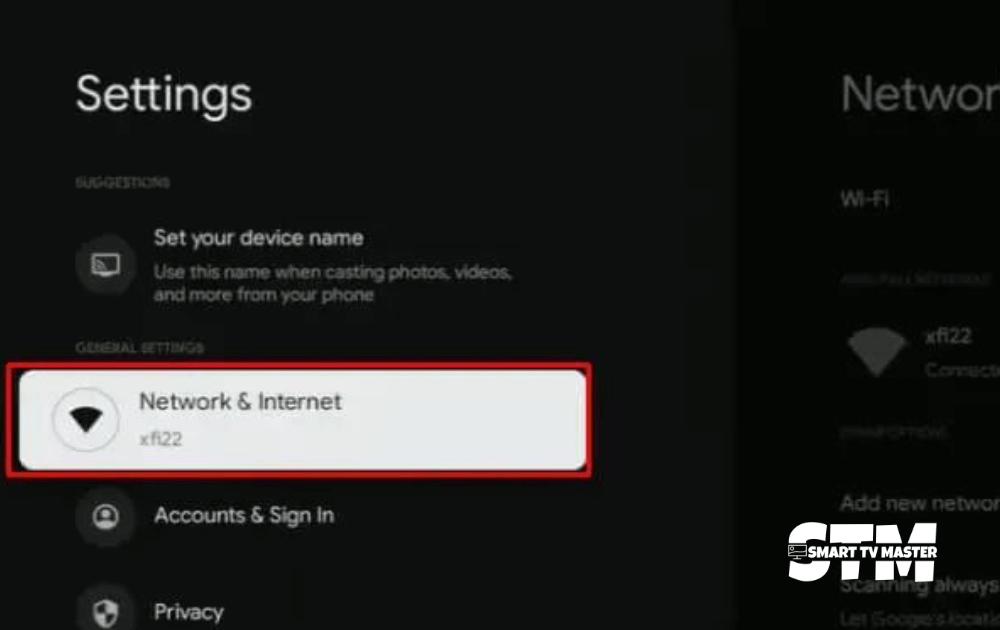
- Navigate the Network & Internet option and click it.
- You will now move to the next screen. Turn on the Wi-Fi and check all the Wi-Fi networks.
- Click on your Wi-Fi network and connect it by adding the password and relevant credentials.
Method To Connect Sharp Aquos TV To Wi-Fi
- On your Aquos TV remote, navigate the Menu button and press it.
- Select your Smart TV from the menu list using the right or left arrow buttons.
- On the right part of the screen, navigate the Internet Setup option and click it.
- Select the Auto Setup option using the remote and then click on Yes.
- Go to the next screen, click Wireless, and tap Next.
- On your Wi-Fi router, locate the WPS key and keep pressing it for at least 5 seconds.
- Lastly, your Sharp Aquos TV will be connected to the chosen Wi-Fi network.
- If you want to do a network connection test, click Yes.
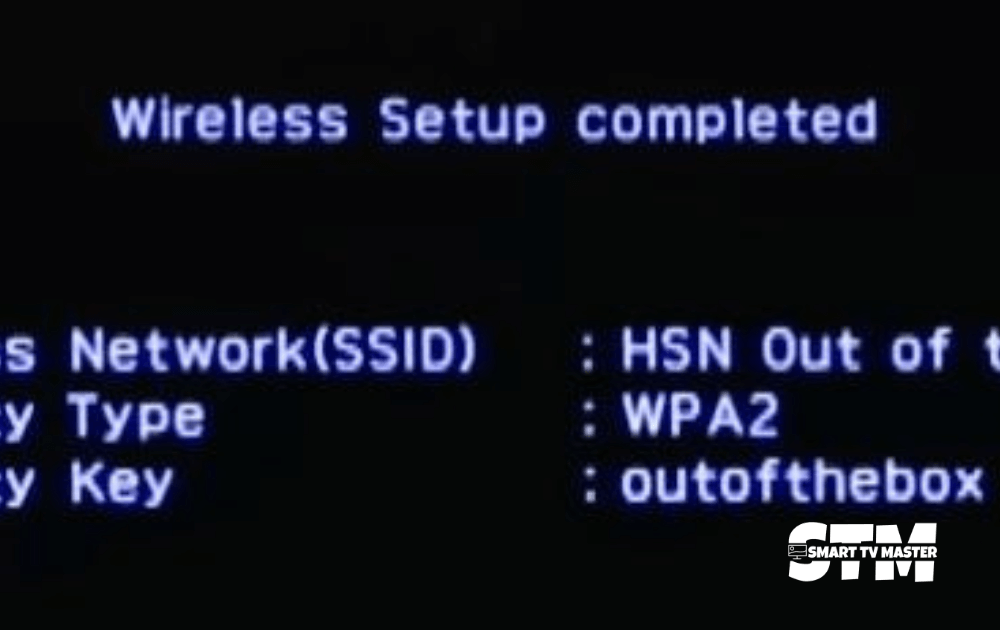
Want to do the setup manually? Then, instead of Auto Setup, click on the Manual Setup option. Enter the SSID of your home network manually. You can connect Sharp Aquos TV to a stable Wi-Fi network.
Method To Connect Sharp TV to Wi-Fi Without Remote
If you don’t have a remote control, don’t worry. You can still connect to Wi-Fi with your Sharp TV. Here are some of the effective methods for this purpose.
Using TV Buttons
Sharp TVs have physical buttons at the side, back, or bottom of the panel to control them. Follow these instructions to connect Wi-Fi to your Sharp TV via physical TV buttons.
- Press the Menu button. Go to the Network Settings.
- From the list, select your home Wi-Fi network.
- Use the arrow button to navigate through the options. After clicking, the connection will easily be established.
Remote Apps
Almost every Sharp TV operating system has at least one remote app. You can download the app and then pair it with your Sharp TV. After doing that, you will be able to control the TV through the app. Here’s how to do it.
- Download the remote app on your smartphone.
- Go to the app’s virtual remote interface.
- Click on the TV settings.
- Tap on your home Wi-Fi network.
- Now, type the password to connect to the internet network.
External Devices
Nowadays, most Sharp TVs have a USB port. You can connect internet connection using these ports. Here are the steps you need to follow.
- Connect the keyboard or wireless device to Sharp TV via a USB port.
- Then go to Settings and click on the Wi-Fi Network. This option is present right below the Network Settings.
- Now, your Sharp TV will establish an internet connection.
Mobile Hotspot
Sometimes, the Wi-Fi router’s internet connection is extremely weak, so it doesn’t connect to the TV. What should you do in this situation?
You should use a mobile hotspot as an alternative to connect Wi-Fi with the TV.
- First, configure the mobile hotspot with the Sharp TV.
- Then click on the hotspot icon. You can find it in the notification panel or go to Settings to turn it on.
- Now, TV will automatically connect to the internet.
Method To Connect Old Sharp TV To Wi-Fi
Most old Sharp TVs don’t have Wi-Fi support. But don’t worry; if your Sharp TV doesn’t, you can establish an internet connection by simply doing this.
Connect the router + Sharp TV → Using Ethernet cable
If your old Sharp TV has Wi-Fi capability, follow these steps.
- Go to Settings on the Sharp TV.
- Scroll down to find the Internet option. If there’s no Internet option, then you should click on Network.
- Under the Network option, you will see a Wi-Fi option. Tap it to establish an internet connection.
- From here, you need to click on the Wi-Fi network to which you want to connect your Sharp TV. Add the Wi-Fi password to complete the setup.
Conclusion
Now you know the different methods of connecting Wi-Fi on your Sharp TV. It allows you to enjoy your favorite content on the big screen. If you still have any queries about connecting Wi-Fi with your Sharp TV, then reach out to us today via email or post them in the comment section. Remember to share this informative guide with your friends. To further enhance your movie-watching experience on Sharp TV, check out our informative guides.


![How to Block Youtube Channel on Roku TV [3 Easy Methods] 24 How-to-Block-Youtube-Channel-on-Roku-TV-[3-Easy-Methods]](https://smarttvmaster.com/wp-content/uploads/2025/02/How-to-Block-Youtube-Channel-on-Roku-TV-3-Easy-Methods-380x250.png)
