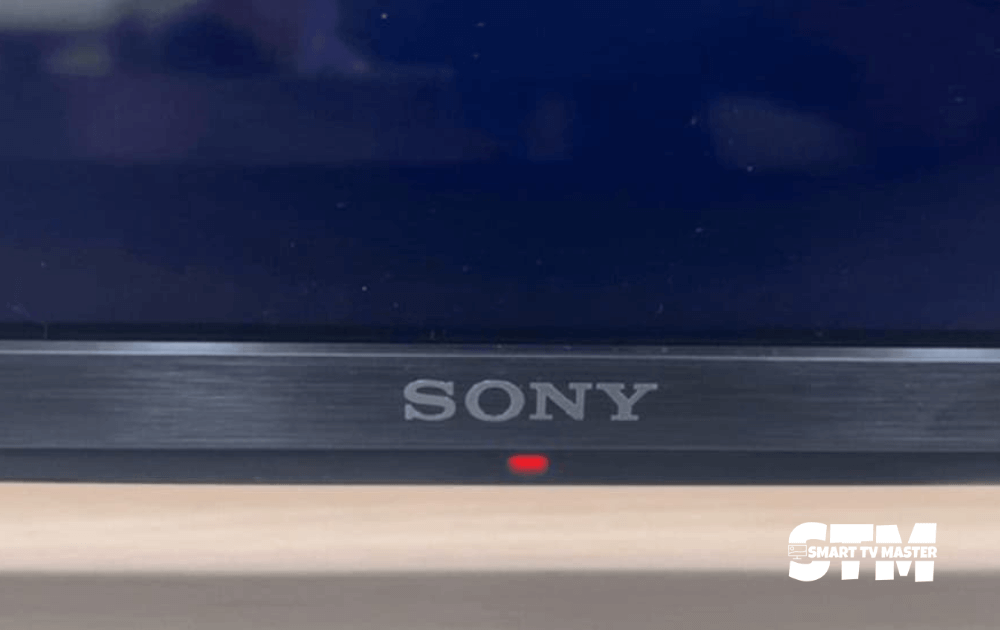
It’s the weekend, and you’re ready to watch the latest Netflix series everyone’s talking about. You plug the TV into the power outlet and take your remote to press the Power button. But suddenly, you notice a sparkling red light that the Sony TV blinking red light. The TV isn’t turning on and the plan to watch the series is ruined now. It can be an extremely annoying situation for TV watchers. Right? Overall, Sony TV is a reliable and reputable brand.
However, sometimes, you might encounter issues that can impact your streaming experience. But we don’t want that to happen. That’s why we have created a detailed guide on how you can get rid of the Sony TV blinking red light. So keep reading.
Quick Answer: The problem often arises because of power issues. You should perform a power cycle or forced factory reset. Then, check the TV’s components to see if they work properly.
Methods To Fix a Sony TV Blinking Red Light
The reason behind the red light blinking can be outdated software, power issues, etc. But we’ll outline all the steps to fix this annoying problem easily. Just follow them step-by-step.
Read: Delete Apps on Vizio TV
1. Perform Power Cycle

You can solve the Sony TV red light blinking problem in just 2 minutes. Do you know how? By power cycling your TV. Here are the exact steps you need to follow.
- Remove the Sony TV cable from the power outlet.
- Keep it unplugged for at least one minute.
- When the TV is unplugged, navigate to its physical Power button and press it for 30 seconds.
- Now plug the TV into the outlet and turn it on. Your Sony TV will start working correctly.
2. Forced Factory Reset
If the annoying red light blinks 2,3,4 or 5 times, you can resolve it by factory reset. However, because of the blinking, you’ll be unable to access the Menu. What should you do in this situation?
You need to do a forced factory reset. Follow these steps for resetting your Sony TV.
- Remove your TV plug from the power outlet.
- Navigate to your Sony TV’s physical Power and Volume (Vol-) buttons. Press both buttons simultaneously.
- Replug your Sony TV to the power outlet. But make sure you’re pressing the Power and Volume (Vol-) button while doing that.
- After plugging in, keep pressing the buttons until you notice the LED light turn green or white. This is an indication that the reset process has been completed. Now, you can stop holding the buttons.
If the reset is successful, the TV will restart automatically. But if that doesn’t happen, turn on the Sony TV by yourself. You’ve tried the method once, but it doesn’t work. What should you do? You should look for any mistakes you might be making during the process. Then try it again. If you’ve tried five times but still haven’t had luck, check out the next methods mentioned in the article. After a forced factory reset, you need to do another reset immediately. If you don’t, there will be errors in the functioning of some applications and features.
Here’s what you need to do.
Home button on remote → System → Storage & reset → Factory data reset → Erase Everything → Yes.
Now you can set up the TV and sign in. The red light will stop flashing.
3. Perform Reset With Remote

If the Sony TV light blinks, you can’t see anything on the screen. Now, how can you perform a factory reset? You can perform a factory reset even with your remote if you have a Sony TV. Follow these steps to fix this problem.
- Remove your Sony TV plug from the power outlet.
- After 60 minutes, plug it in, and your TV should start automatically. If that doesn’t happen, press the physical Power button on the TV.
- Now your TV will start up. You need to wait approximately 60 seconds.
- After doing that, navigate the Up arrow button on the remote. Press it and direct your remote towards the TV.
- Keep pressing the Up arrow button and the TV’s physical Power button. Stop pressing when Reset appears on the Sony TV screen.
- Now, the TV will turn off for a while and turn back on. Stop pressing the Up arrow button.
- If the TV is turned off even after the reset, turn it on by pressing the physical Power button of the Sony TV.
- Some instructions will appear on the screen. Follow them to complete the initial setup and get your Sony TV to stop blinking red light.
4. Check Vents Blockage
Often, the Sony TV is placed in direct sunlight, such as near a window or fireplace. This leads to overheating, which causes the red light to start blinking and the TV to shut down. So carefully check if you need to change the position of your Sony TV. Inspect bottom vents and ensure no object is stopping the airflow.
5. Remove Connected Devices

Have you connected other devices with your Sony TV? Then the issue might be in the connected devices and not your Sony TV. Here’s what you need to do.
- Power off your Sony TV.
- Remove all the devices connected to the TV.
- Turn on your TV again. If the little red one stops blinking, you already know the culprit.
6. Look For Software Update
Sometimes, the TV software is outdated, and as a result, it starts malfunctioning. You should check and update the firmware to the latest version. Since the TV isn’t showing anything on the screen, use this method to update it.
- Connect your Sony TV with a stable internet connection.
- Now go to Settings and then click on Device Preferences.
- Here, tap on the About section and then on System Update.
- The Sony TV will start looking for updates. If there’s a new update, the TV will start downloading it.
- After the download is completed, Sony TV will reboot.
7. Warm Up Vents
When the TV isn’t turned on for weeks or months, the capacitors start to discharge capacitance. The ideal solution is to open your TV. But only do this if you’re an expert. Here are the steps you should follow to warm up through the vents.
- Turn on your Sony TV while the red light keeps blinking.
- Navigate to the TV opening under, back, or to the side of the TV. Turn on the hot air blower at the vent of the TV for a minimum of 30 to 60 seconds.
- Now turn on your Sony TV. It’ll start working normally, and you can say goodbye to the red light blinking issue.
10. Replace Faulty LED Strips
The TV illuminates because of the backlight, which illuminates the pixels. As a result, users can see visuals, and that’s how you enjoy Netflix shows and anime. Backlight issues are common, so it’s important to replace faulty LED strips. This method confirms faulty backlights.
- Turn off all the lights and power on your Sony TV.
- Turn on your smartphone’s flashlight and shine it directly on the TV screen.
- If the image is dark, it means there’s a backlight failure. Light coming from corners of the screen, dark patches, and clear backlight bleeding are also warning signs of bad backlight, which might be causing Sony TV’s red light to blink.
9. Cool Off Internal Components
The lack of airflow to the TV’s components is a common cause of red light blinking. What should you do to fix this problem? You should prevent the components from self-heating by keeping the TV unplugged for 6 to 7 hours per day. This allows all the components to cool off and eliminates the red light blinking issue.
10. Check Faulty Capacitors
Check the power board, specifically the capacitors, and analyze for damage. But how will you know that the capacitor is faulty?
Here are some warning signs you should look out for indicating faulty capacitors.
- Leakages
- Bulging at top
- A layer of rust on both sides
- The bottom bung is swollen and pushed out.
Sometimes, the capacitor is faulty, but there are no physical signs. That’s why you should use a multimeter to check and compare the voltage. To remove the capacitor, follow this method.
- Note the exact pin where the capacitor is attached, or take a picture. Use a soldering iron to remove the capacitor.
- Heat the soldering iron and put pressure on the back of the board. Keep doing it until the capacitor melts completely.
- Remove the capacitor and insert a new capacitor in the same location as the old one.
11. New Regulator IC
With an IC regulator, the voltage in and out of the board stays at equilibrium. But what if it’s not stable, or there’s some fault in it? In that case, the voltage will be extremely low. Your Sony TV will not get enough power, and as a result, it’ll keep blinking. To fix this problem, you should replace the main board regulator IC. It’ll most likely resolve the problem of the red light blinking constantly on Sony TV.
12. Analyze Power Supply & Main Boards
Now that you’re sure the Sony TV has no internal damage you should check further. You should mainly look for faulty capacitors and blown fuses. If the capacitor is faulty, you should replace it with a new one. Ensure it matches the ratings, especially voltage, temperature, and microfarads. But what if the capacitors are working perfectly fine? Then you should get a new power supply board for a Sony TV. However, most users don’t opt for this solution because it’s extremely costly. So they prefer purchasing a new TV instead of replacing the entire power board.
13. Contact Sony TV Customer Support
If you’ve tried all the methods mentioned in the article yet none of them are effective, then you’ll have to settle for this solution: contacting Sony TV’s customer support team. If your TV is under one year old, you can avail of the warranty to get it replaced. Simply call them on their numbers: 239-245-6354 or ask for a callback. But if Sony is unable to fix your TV? Even then you might get a discount on future models of your company. So it’s worth a try.
Sony TV Blinking Red Light Codes
Do you know that the blinking red light is mostly telling the issue? There are specific blinking codes and depending on how many times the Sony TV red light is blinking you can find the root cause of the issue. Here’s a quick overview so you can get clarity.
| Number Of Red Light Blinking | Issue |
| 1 | Not applicable for troubleshooting |
| 2 | Faulty power board |
| 3 | Faulty power board |
| 4 | Mainboard overheating |
| 5 | T-Con board issue, Bad LCD panel connection or internal LCD short |
| 6 | Backlight error or faulty inverter board |
| 7 | Mainboard fault |
| 8 | HFR error, bad T-con, or bad LCD panel |
| 9 | Not known |
| 10 | Not known |
| 11 | T-con error, bad T-con board, or bad LCD panel |
| 12 | Trident IC or a bad mainboard |
| 13 | Backlight balance error, bad LCD panel or inverter board |
| 14 | Backlight balance error, bad LCD panel, or inverter board |
Conclusion
No matter what type of light is blinking and how often it happens, it’s an alarming situation that should be resolved immediately. Check out our detailed guide before sending your TV for repair or replacement. It helps troubleshoot several causes and decide if professional help is needed. Want to know more about how to make your movie buddy, aka Sony TV, work seamlessly? Check out our smart TV guides here. Don’t forget to share this article with your friends.


![What Channel Is Univision On Roku [2025 Quick Guide] 22 What-Channel-Is-Univision-On-Roku-[2024-Quick-Guide]](https://smarttvmaster.com/wp-content/uploads/2024/05/What-Channel-Is-Univision-On-Roku-2024-Quick-Guide-380x250.png)